Search

Categories

Showing posts with label Lentils/Pulses/Beans. Show all posts

Tuesday, March 5, 2013

Lemon Rasam

How often, when asked about what we cooked for dinner, have we responded with -"Oh nothing, just some rasam"! Just think about it, even a simple dal gets a better mention when compared with this South Indian staple. What do we turn to when we are down with the sniffles, what do we resort to cooking when we are out of time and ideas, what do we make when we are thinking of home - as far as I am concerned, the answer to all these is Rasam.

Today's recipe is the humble Rasam -  Lemon Rasam. For the uninitiated, there are a zillion different varieties of rasam, not the standard one prepared in the restaurants. Ditto for sambaars. But that is for another day and another post. For now, let us stick to the lemon rasam. Infact, I prepare lemon rasam also in two different ways. One is from the recipe book "Dakshin". The other, the one that I am posting today, is the way my mom prepares it.


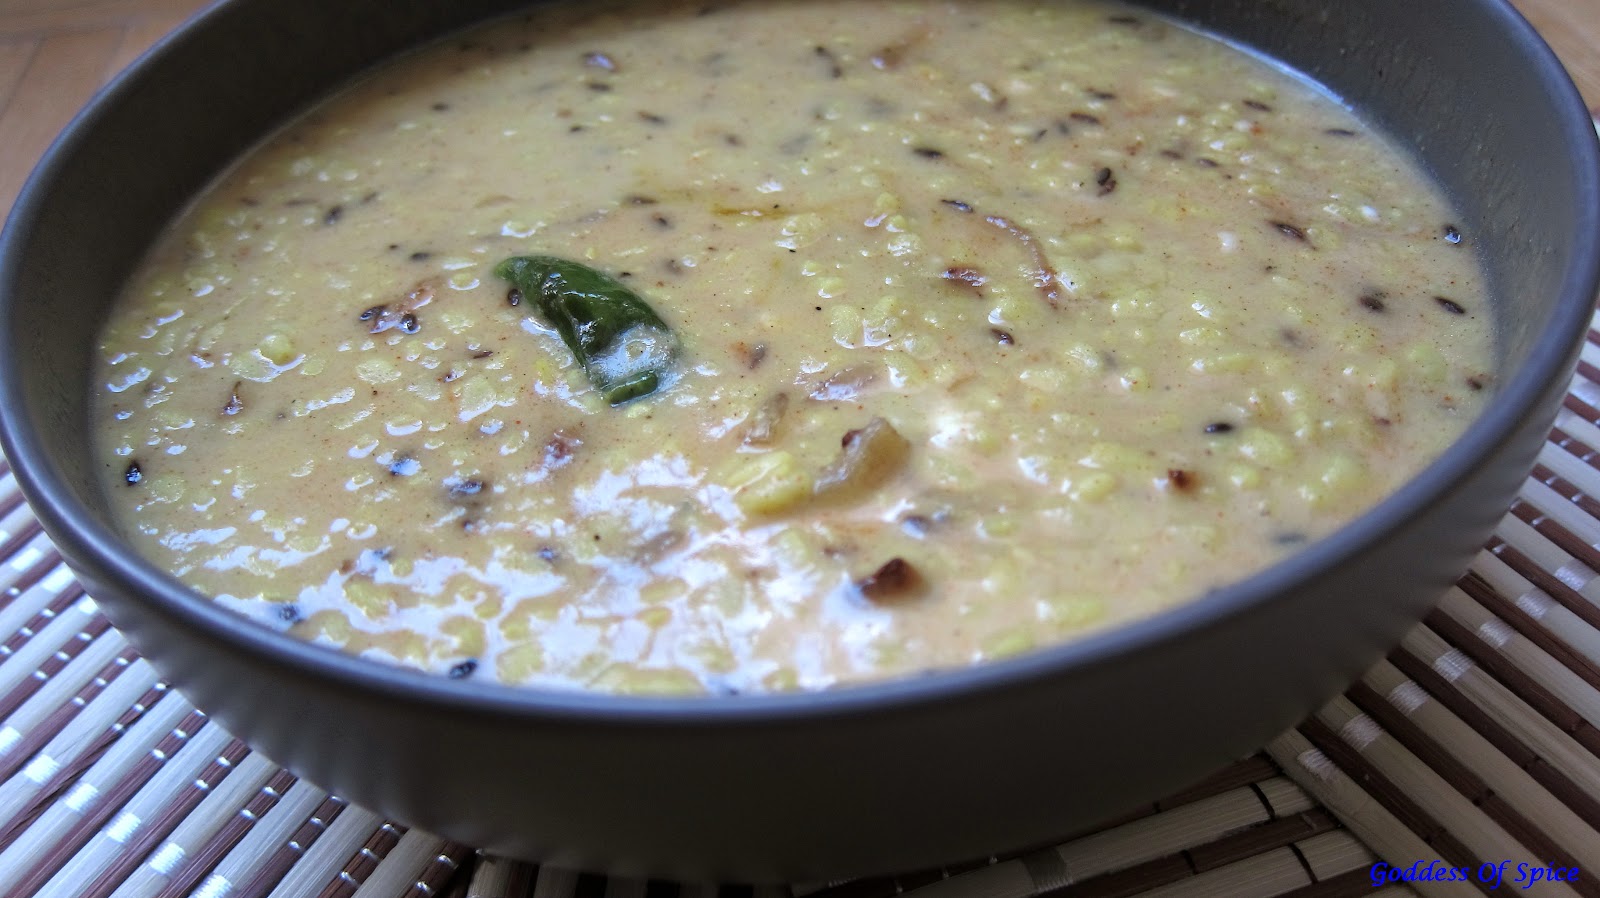
Rasam is generally associated with a tamarind base, but for lemon rasam, you don't need any tamarind. The lemon provides the required tanginess. I have used homemade rasam powder - will soon be posting the recipe for the same. Feel free to use the store bought one thought. Serve rasam with rice and a curry on the side or drink it up hot and steaming as I do - yummy!

Preparation & Cooking: 15 minutes          Serves: 2-3

Ingredients:

Toor Dal/Red Gram Dal - ¼ cup
Tomato - 1
Green Chillies - 2
Ginger - a small bit
Turmeric/Haldi Powder - ½ teaspoon
Asafoetida/Hing - a pinch
Rasam Powder - 1 teaspoon
Water - 4 cups
Lemon - 1
Curry Leaves -  a few
Salt - to taste
Cilantro Leaves - for garnish
For Tempering: 
Ghee/Clarified Butter - 2 teaspoons
Mustard Seeds - 1 teaspoon
Whole Red Chillies - 2

Method:
  1. Cook the dal in a pressure cooker with a pinch of turmeric and salt, till it is soft and mushy.
  2. Grind together the tomato, ginger and green chillies into a smooth puree.
  3. Combine the prepared puree, 4 cups of water, asafoetida, turmeric powder, rasam powder, curry leaves and salt in a sauce pan and bring it to a boil.
  4. Once the liquid begins to froth over, mash the cooked dal with the back of a ladle and add it to the rasam. Let it cook for another minute.
  5. Turn off the flame and add the the juice from one lemon. 
  6. Prepare the tempering by heating the ghee and adding the mustard seeds and red chillies to it. When the must seeds splutter, add the tempering to the rasam. Garnish with cilantro leaves

Serve hot with rice and side dish of choice.

Friday, January 25, 2013

Doodhi Chana Dal

Started gymming this week after a gap of two months - two months which included the holiday season, two months of gorging on cookies, cakes, fried stuff and anything sugary, two months of lazing around and blaming the cold weather for the general inertia! The pounds have added on - I can literally see all the junk food deposits - love handles and all - ugghhh!

Now that I have started with the workouts though, I am hoping that I will exercise control over my palate as well! Abstinence is a word non-existent in my dictionary. What I hope to do though is make "Everything in moderation" my new mantra!

Anyone who has done something physically exerting after being a couch potato for a long time will understand what I am experiencing after hitting the gym for 4 consecutive days after the long break. Every part of my body is hurting - even those I didn't know existed! Yesterday's session was particularly brutal and it took a lot of will power for me to step into the cardio room today! Must say I am proud of myself. Don't ask me how I am rewarding myself for that  :p !!

But once I got back from my "punishment" session today I just did not have the energy to cook anything elaborate. I wanted to make something quick, yet filling and healthy. So I opted for doodhi chana dal. It has chana dal that takes care of the protein part and doodhi is one of those vegetables that has so many health benefits associated with it that it makes me wonder why it is not categorized as a medicine instead of a vegetable! I am serious - just google it. Doodhi/lauki/bottle gourd/ opo squash/sorakai - whatever you call it in your language - has so many traditionally healing properties associated with it that it should be on the "must have" list of every home. It is low in calories and fat, good for diabetics, good for digestion, has a cooling effect with high water content, balances liver function, helps treat blood pressure and heart diseases etc etc etc.


Well - exercise and doodhi chana dal - I think I have reached my "healthy quota" for the week - what say you??


Soaking Time: 1 hour     Preparation & Cooking: 20 minutes          Serves: 3-4

Ingredients:
Chana Dal (Bengal Gram Lentil) - 1 cup
Doodhi/Bottle Gourd - 1, diced
Cumin Seeds (Jeera) - 1 teaspoon
Asafoetida (Hing) Powder - a pinch
Dried Red Chillies - 2

Ginger -  1 teaspoon, minced
Turmeric (Haldi) Powder - ½ teaspoon
Red Chilli Powder  - 1 teaspoon
Dried  Mango (Amchur) Powder - 1 teaspoon
Garam Masala - 1 teaspoon
Salt - to taste
Cilantro - chopped, for garnish

Oil - 1 tablespoons

Method:
  1. Rinse and soak the chana dal for an hour.
  2. Heat the oil in a pressure cooker and add the cumin seeds and asafoetida powder. When the seeds crackle, add the dried red chillies and ginger.

  3. Now add in the dal, diced bottle gourd, turmeric powder, red chilli powder and salt and mix well.
  4. Add enough water to cover the dal, close the pressure cooker and cook the dal for 4-5 whistles. Once the steam is all let out, open the cooker and add the garam masala and amchur powder and garnish with chopped cilantro.
  5. Delicious Doodhi Chana Dal is ready. Goes well with both chapathis as well as rice.


Sending this across to New "U" 2013 @ Zesty Palette.

Wednesday, January 23, 2013

Paalak Masoor Dal

Was having another of those "I don't want to eat food made by me" days. Every now and then I'll go through this phase when I just get bored of tasting "my own haath ka khaana"! And on such days, the one thing that brings comfort is memories of food cooked by amma. Even better, making whatever I am craving, following her recipe to the T.

It is funny what we desire at times. One would think chaats and other snack items or sweets would trump simple day to day food when it comes to cravings! But it is my mom's paalak dal, khichdi, aaloo curry, kadhi, tomato rice and even lemon rasam - typical everyday food - that I miss the most!

Well, most recently I had a hankering for her paalak masoor dal. This is one of her "hit" items! Now, masoor dal (split red lentil), or pink dal as I used to call it,  is not very common among south Indians (which is what I am) and Mumbaikars (where my entire clan hails from)! This I came to know much later (after I got married, to be precise, for that is when I stopped identifying dals by their colors - sure was surprised to know that there were so many different yellow dals!). Till then I never understood what was so special about this dal that had people wondering how my mother's paalak dal got that unique taste. That was because she was using masoor dal instead of the standard moong dal that most people we knew were using. Well my mother's culinary repertoire includes dishes from all over the country thanks to my dad's job which took him to a lot of different places. And she tends to capture the local flavors pretty well!


So, for this dal, I stick to whatever she uses - thankfully I have made this enough times to no longer require a phone call to ask for the recipe! Though I do have friends calling me for the recipe once they have tasted it at my place ;)

Preparation & Cooking: 15 minutes          Serves: 2-3

Ingredients:
Masoor Dal (Split Red Lentil) - 1 cup
Spinach - 1 cup, chopped fine
Mustard Seeds - 1 teaspoon
Cumin Seeds (Jeera) - 1 teaspoon
Asafoetida (Hing) Powder - a pinch
Onion - 1 small, chopped
Ginger -  1 teaspoon, minced
Green Chillies - 2, chopped fine
Tomato - 1 small, diced
Turmeric (Haldi) Powder - ½ teaspoon
Coriander (Dhania) Powder  - 1 teaspoon
Cumin (Jeera) Powder - 1 teaspoon
Salt - to taste
Cilantro - chopped, for garnish
Butter - 1 tablespoon (optional)
Oil - 2 tablespoons

Method:
  1. Heat the oil in a pressure cooker and add the mustard seeds, cumin seeds and asafoetida powder. When the seeds crackle, add the onions, green chillies and ginger.
  2. Once the onions turn translucent, add the tomatoes, turmeric powder, cumin powder and coriander powder. Saute for a couple of minutes.

  3. Now add in the dal (make sure it is rinsed thoroughly), the chopped spinach and salt to taste. Give it a good stir.

  4. Add enough water to cover the dal, close the pressure cooker and cook the dal for 2-3 whistles. Once the steam is all let out, open the cooker and add a tablespoon of butter and garnish with chopped cilantro.

  5. Steaming hot palak masoor ki dal is ready. Teams perfectly with jeera fried rice!


    Handy Tip: You could use ghee instead of oil for this recipe but I prefer oil as that is what my mom uses.
    On the other hand, the extremely health conscious may omit the butter, but trust me, the creamy taste when butter is added is just too good to be missed!

Sending this across to
Zesty South Indian Kitchen's  Favorite Recipes: Lentil, Legume, Beans Recipes
Gayatri's Cook Spot's Walk Through Memory Lane - January
and New "U" 2013 @ Zesty Palette.

Friday, June 1, 2012

Moong Dal With Spinach

 We are a big fan of spinach in my house. I try to cook spinach every week in some form or the other. As my son is a very poor eater, I try and include a lot of vegetables in our diet - not just as the dry sabzi but also in the protein part of our meal. Dal is something that is very easy to make and I make it every day. So, using spinach while making dal is one of my favorite ways to include this leafy vegetable in our diet. Another point in its favor is that my son loves eating dal rice with ghee in it! Add in the spinach there and I have a wholesome meal, one that my little one enjoys!


I usually make spinach with split moong dal or with masoor dal. I was looking for an alternative, when I came across this recipe in Manjula's Kitchen. The fact that it has no onions also helped me out as I was out of onions today. This recipe uses split moong dal with skin. It turned out pretty delicious and provided a nice variation in taste from my usual dals. Just a simple difference as using the dal with its skin made a lot of difference in flavor from using split moong dal without its skin!

Soaking Time: 30 minutes       Preparation & Cooking: 10 minutes       Serves:4
Ingredients:
Split Moong Dal with skin - 1 cup
Spinach - 1 cup, chopped fine
Ginger - 1 teaspoon, minced
Turmeric/Haldi Powder - ½ teaspoon
Garam Masala - ½ teaspoon
Lemon Juice - 2 tablespoons
Salt - to taste
For Tempering:
Clarified Butter/Ghee - 1 tablespoon
Cumin Seeds/Jeera - 1 teaspoon
Asafoetida/Hing - a pinch
Whole Red Chillies - 2
Red Chilli Powder - ½ teaspoon

Method:
  • Soak the moong dal in water for about 30 minutes. Rinse and drain.
  •  Pressure cook this dal with spinach, turmeric powder, salt and minced ginger till the dal softens and is a bit mushy.
  • Once the steam is let out, open the pressure cooker, mix in the garam masala and lemon juice.

  • In a tempering pan/vessel, heat the ghee and add the cumin seeds. When the crackle all the rest of the tempering ingredients and give it a good stir.Then add about a teaspoon of water so that the red chilli powder does not burn. Pour this tempering over the dal.
Moong dal with spinach is ready to be served. It serves well with rice as well as rotis.

Monday, May 14, 2012

Punjabi Chole Masala

We had a friend visiting us from California this weekend. Apart from eating out and gossiping, we also had them over for lunch yesterday, you know, the typical "खाने पे आ जाना"! The menu was Punjabi Chole Masala, Puris, Capsicum Corn Curry, Couscous Pulao and salad. Will eventually put up all the recipes, but for now, let's stick to Punjabi Chole Masala. 

Kabuli Chana/Chickpeas/Garbanzo beans are a very popular in my house. Specially when served with puris. Infact, at my mom's place puri was always served with chole and meetha chutney (another recipe which I hope to put up soon). And how can I forget Shrikhand? Yummy!

For the chickpeas, you can use the canned version, but I am a real snob when it comes to certain recipes! Seriously, in a pinch, I don't mind using canned beans, but if I have the time and I know in advance that I am going to make a certain dish, I definitely prefer soaking the beans over night. This recipe is one such, where I don't like using the canned ones.

I cook the chickpeas with a tea bag. You can put a few tea leaves in a muslin bag/cheesecloth and use that as well. But I usually keep some masala tea bags handy just for this purpose! They impart a nice flavor and color to the chickpeas. How I came about using these tea bags is another story! Once DH got these masala tea bags when I was in India. But he hated the taste and just left them as it is. When I came back, I was left with this box of tea bags, so decided to use them for making chole instead of going through the pain of tying loose leaves in a cheesecloth. I loved it! Since then, I buy some masala tea bags and keep them in the pantry.

Some people cook the chickpeas with a little soda bi carbonate (baking soda) to soften them, but don't feel the need to do so. Soaking them overnight and pressure cooking them makes them soft enough.


Preparation & Cooking: 30 minutes (excluding 10-12 hours soaking time)              Serves:4-5

Ingredients:

Chickpeas/Garbanzo Beans/Kabuli Chana - 2 cups
Masala Tea Bag - 1
Onion - 1 medium, chopped fine
Green Chillies - 2, minced fine (almost to a paste)
Ginger - 1 small piece, minced
Garlic - 2-3 cloves, minced
Tomatoes - 4 medium, pureed
Potato - 1 medium, peeled and cubed
Cumin/Jeera Powder - 1 teaspoon
Coriander/Dhania Powder - 2 teaspoons
Turmeric Powder - ¼ teaspoon
Red Chilli Powder - ¼ teaspoon
Amchur/Dry Mango Powder -  ½ teaspoon
Chole Masala Powder - 1 teaspoon
Salt - to taste
Oil - 2 tablespoons (I use olive oil)
Lemon Juice - 2 tablespoons
Cilantro Leaves - for garnish

Method:
  • Soak the chickpeas in water overnight (10-12 hours). They will double in size by morning.
  • Pressure cook this with a little salt and a tea bag till they are soft but not mushy. 
  • In the mean time, heat oil and saute the onions, green chillies, ginger and  garlic with salt to taste till the onions turn translucent.
  • Now add in the cumin powder, coriander powder, red chilli powder and amchur powder and mix.
  • Before the spices begin to burn, add in the tomato puree and the cubed potatoes and give it a good stir. Add a little water and let this cook for about 10 minutes, till the potatoes get cooked.

  • Now add in the chickpeas (after discarding the tea bag) and a heaped teaspoon of chana masala.
  • Let this simmer, stirring occasionally for another 10 minutes. Turn off the heat and add the lemon juice and garnish with cilantro leaves.

Serve hot with puris, bhaturas or chapathis. You could also garnish this with raw onions cut into rings and a couple of slit green chillies.

Handy Tips:
You could use garam masala instead of chole masala.
For the tanginess in the recipe, you could replace the amchur/dried ginger powder with a little tamarind paste. But I feel amchur powder gives it a more authentic taste.

Tuesday, May 1, 2012

Dahi Urad Dal

Every night for dinner, Monday through Thursday, I try to put some kind of protein in the form of dal, chole, rajma etc and one veggie side dish as an accompaniment to rotis and rice. There are a wide variety of dals and beans available, even then, I feel like I exhaust the list very soon and then end up repeating recipes. So I try my best to try out the same pulses (lentils) and beans with variations in spice and cooking method.

Tonight's recipe is one such creation. Dahi Urad dal is my take on the sukhi urad dal that is a typical preparation for black gram dal, albeit in a liquified form!

When I made this dal for the first time, my husband's reaction was are you sure you can cook this dal  in this way, isn't urad dal just meant for tempering curries? Infact, a couple of my friends had similar reactions when I mentioned making this, urad dal, really? Isn't that for idli batter and dahi vadas?

Well, its a dal that softens pretty quicky on cooking (specially if you soak it for an hour prior to cooking). Also, it tastes good. So, why not? It has its own unique taste and serves as a nice change from the usual toor, moong & masoor dals. So, go ahead and make it for dinner next...

Preparation & Cooking: 1hour for soaking dal + 20 minutes                   Serves: 2-3
Ingredients:
Urad/Black Gram Dal - 1 cup (use the split dal without skin)
Ginger Garlic Paste - 1 teaspoon
Turmeric/Haldi Powder - ¼ teaspoon
Salt - to taste
Yogurt - 2 tablespoons
Ghee - 2 teaspoons
Oil - 1 tablespoon
Cumin Seeds/Jeera - 1 teaspoon
Asafoetida/Hing - a pinch
Onion - 1 small, sliced thin
Green Chillies - 2, slit
Kashmiri Red Chilli Powder - ¼ teaspoon

Method:

  • Soak the urad dal in water for about an hour.

  • Pressure cook this dal with ginger garlic paste, turmeric powder, salt & water till the dal is cooked well and can be mashed easily with the back of the laddle.
  • Once the  pressure is completely out, open the cooker, add more water if desired and the yogurt, stirring continuously on a low flame, so that the yogurt does not curdle. When the yogurt is well mixed switch off the flame.

  • In the meantime, heat the ghee and oil in a saucepan and add the cumin seeds and asafoetida.
  • Once the cumin seeds crackle, add the onions and green chillies and saute them till the onions begin to brown.

  • Just before taking the onions off the flame, add the Kashmiri red chilli powder and add these onions to the dal.

Mix well and serve.

Tuesday, April 17, 2012

Jhatpat Black Bean Chilli

You know those days when you don't want to spend too much time in the kitchen? I know what you are thinking! Isn't that everyday? For such days when I am not in a mood to cook something elaborate, I keep some ingredients handy that I can just put together quickly and serve an "instant" meal of sorts!

What would we do without canned goods? I definitely prefer dried beans soaked overnight for cooking as well as fresh tomatoes and herbs. But for those "am down in the dumps" days when you feel its a lot of effort to drag yourself off the couch, canned goods and instant mixes are the perfect solution. You have to be careful though - all those preservatives and high sodium content can prove to be quite harmful if used excessively. But once in a while, you are allowed to let things slide and take it easy :)

This black bean chilli is one such recipe, where all you do is open cans and rip open a packet!

Preparation & Cooking: 15 minutes                   Serves: 2-3

Ingredients:

Canned Black Beans - 15.5 oz, rinsed
Diced Canned Tomatoes - 14.5 oz, pureed
Taco Seasoning Mix - 1 packet
Onion - 1 small, chopped
Sour Cream - 2 teaspoons
Salt - to taste
Sugar - a pinch
Oil - 1 tablespoon

Method:


  • Saute the onions in oil till the begin to brown.
  • Now add in the salt, sugar, black beans, tomato puree and taco seasoning.
  • Cover and let it cook on a low flame for 10 to 12 minutes.
  • Remove from flame and add sour cream.
A quick, delicious steam bowl of chilli is ready!

Tuesday, March 27, 2012

Moong Tomato Soup

After a wonderful week of eating out and enjoying, have decided to seriously try and lose all the excess pounds before summer officially begins. This isn't New Year's eve, but have made a resolution nonetheless! I am going to workout regularly and exercise control over my diet. Nothing too drastic in the food department though - that would be asking for too much from a foodie like me! So, as a part of the new healthy eating phase, have decided not to eat rice for dinner. In fact, I would like to stick to just soups and salads as far as possible - let's see how far that works out! Am hoping since its out there in black and white, will try harder to stick to it!!


Hence the recipe for tonight - moong tomato soup. I do love the creamy tomato soups with heavy cream and butter, but that would definitely throw my resolution out of the window. So, I was looking for other options when I came across this tomato soup recipe at Tarla Dalal's website. I liked the idea of using moong dal for the soup's creaminess. But that's about all I took from that recipe and completely modified it to suit my taste. I added brown sugar because I read somewhere that it helps cut the excessive acidity from the tomatoes. So here goes...

Preparation & Cooking: 25 minutes           Serves: 4

Ingredients:

Moong Dal - ½ cup
Diced Tomatoes - 1 14.5 oz can
Grape tomatoes - 1 dry pint
Onion - 1 chopped fine
Garlic - 2 cloves, minced
Celery Stalks - 3
Carrots - 2, shredded
Mint Leaves - a handful
Roasted Cumin Powder - ¼ teaspoon
Turmeric Powder - a pinch
Brown Sugar - ¼ teaspoon
Salt - to taste
Pepper powder - to taste
Vegetable stock - 4 cups
Olive Oil - 2 tablespoons
Ghee/Clarified Butter - 1 teaspoon

Method:
  • Rinse the moong dal, soak it in water and set it aside.
  • Heat the ghee and oil together in a pressure cooker and saute the chopped onion, garlic, celery and shredded carrots in it.


  • Once they begin to soften (about a couple of minutes), add the cumin powder, turmeric powder, salt, diced tomatoes, grape tomatoes, mint leaves, brown sugar, moong dal and vegetable stock. I leave the grape tomatoes and mint leaves whole for now, as they will get mashed in a blender later. 


  • Pressure cook this mixture until the moong dal turns soft and mushy. Once this cools, use a blender to puree it to the required consistency. I like a slightly grainy texture, but you may make it very smooth as well.
  • If you think it is too thick, add a little water/stock at this stage and bring it to a boil. On the other hand, if the soup is too watery, add some bread crumbs and bring it to a boil to thicken it.
  • Ladle the soup into serving bowls and season it with freshly ground pepper to taste. Serve hot with croutons or as is.

Handy Tip: I pureed the left over soup into a smooth paste. Tomorrow, I'll  add some cooked pasta to it and send it for school lunch for my kiddo.

Monday, March 12, 2012

Cannelloni Beans - Desi Style

I usually keep a tin of cannelloni or white kidney beans handy as I like to add them in my soups. But for tonight's dinner, I decided to cook them in typical Indian flavors. The blend of dry spices along with onion, ginger and tomato gave this bean a wonderful aromatic taste. I use the microwave quite a bit in my day to day cooking to quicken the process and multi-task, as I don't have to baby sit most food in the microwave. Feel free to use the stove top if you so desire.

Preparation Time: 15 minutes           Serves: 4

Ingredients:

Cannelloni/White Kidney Bean - 1 can
Onion - 1 small, chopped roughly into chunky pieces
Tomatoes - 3
Ginger - 1 small bit
Cumin Seeds - 1 teaspoon
Coriander Seeds  - 1 teaspoon
Fennel seeds - ½ teaspoon
Cinnamon Powder - ½ teaspoon
Cardamom Powder - a pinch
Red Chilli Powder - 1 teaspoon
Sour Cream - 1 teaspoon
Salt - To taste
Oil - 2 tablespoons

Method:

  1. Make a few slits on the tomatoes using a knife and microwave them immersed in water for about 4 minutes.


  2. After they cool enough to handle, peel off the skin.


  3. Microwave the onions and ginger along with a little salt and a tablespoon of oil for about 2 minutes.


  4. Roast the spices on a low flame until they turn reddish brown and give out a nice aroma.


  5. Now, blend the tomatoes, onion-ginger mix and the dry spices together in a mixer to form a smooth puree.

  6. In a pan, heat the remaining oil and add the pureed mixture and the sour cream. 


  7. Bring  it to a boil and add the cannelloni beans. Add water at this stage if you find the gravy to be too thick. Gradually bring it to a boil and take it off the flame.


Quick & delicious cannelloni beans are ready to accompany your rice or chapatti.